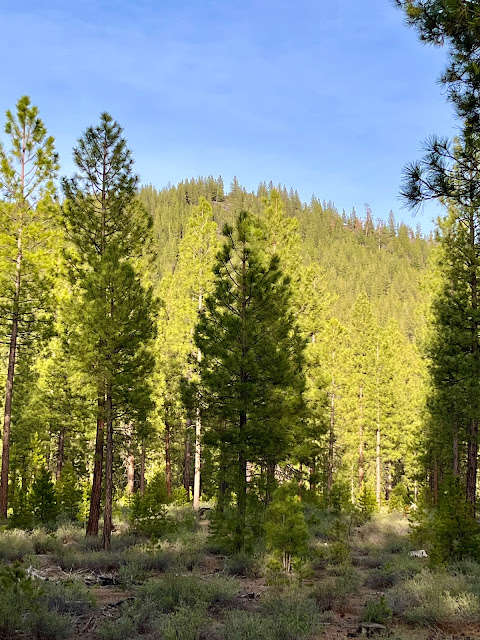
I wasn't sure if I was going to get out to activate this weekend due to the rain in the forecast but things cleared up and it began to warm up so I decided to check out the Horse Ridge activation. I've ridden mountain bikes in the area quite a bit but mostly on the Northern slope of the area. The activation zone is on the southern most ridge, on the opposite side of the Golden Valley as its knows to the local riders. Looking at Google maps I planned to approach from the east via a double track that looked accessible from road 2015 but as I turned onto the double track I noticed the Private Property signs. I continued up the road until I got to a gate and a lot of shelled out old RV's and decided it was a good turn around point.
Planned route (red) wasn't accessible due to private property
I pulled up the SOTA Goat App and found a spot to park off of Ford Rd. that was about a 1/2 mile below the activation zone and decided to use my GPS to guide me to the summit.
The hike up started out pretty loose and soft sand, but become more stable but rocky at the tree line. It took me about 30 mins to get to the top and another 15 to find a spot and setup.
I found an old fence post that made a perfect hitching post for my telescopic pole so I hung the 20 meter wire, assembled my chair and assembled the kit.
The contacts came slowly and I struggled a bit copying callsigns but brought a new tool with me this week, a Sony digital recorder with the idea that if I didn't copy the calls after a couple of attempts I could review once at home. This turned out to be a great idea and helped me relax a bit.
I made a total of 5 contacts, 4 on 20 and 1 on 40. I tried my hand on 17 but nothing heard.
After about 90 minutes I decided to pack it in and head back down the hill to the truck. The hike down only took about 17 minutes. Watch you step, there is plenty of opportunity to trip on a rock.
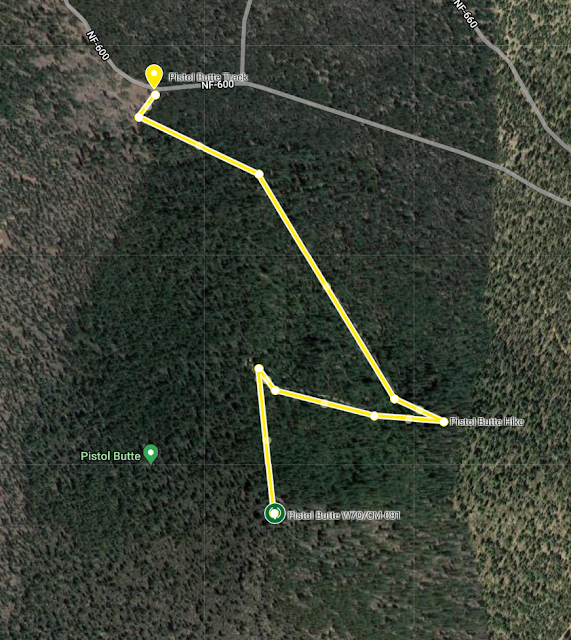
After an aggravating day at the J O B, I decided on an impromptu SOTA attempt with my newly built Penntek TR-35. I spent part of my morning building a Google map of an area near Sunriver, OR for a future Moto-SOTA adventure. Most of the summits in the area are drive/ride-ups but there are two that require a short hike, Pistol Butte and Bates Butte. I've been up Bates Butte on foot and mountain bike before, so I decided to try Pistol Butte.
Pistol Butte from the West
Its about a 3 mile drive on good gravel/dirt after turning off the pavement off South Century Drive ~ 10 miles SW of Sunriver. The access road is rough so I parked the van at the intersection of FS-600 (43.82181, -121.55954) and walked up the road. The road goes up quickly but wasn't too steep until the last 200 yards or so, where it pitched up dramatically and I was happy I brought my hiking poles. I think the road could be done with a Jeep or motorcycle, I saw evidence of moto and UTV tracks. There is a really nice camp spot just below the summit, where the pitch increases, if so inclined.
Parking spot and access track
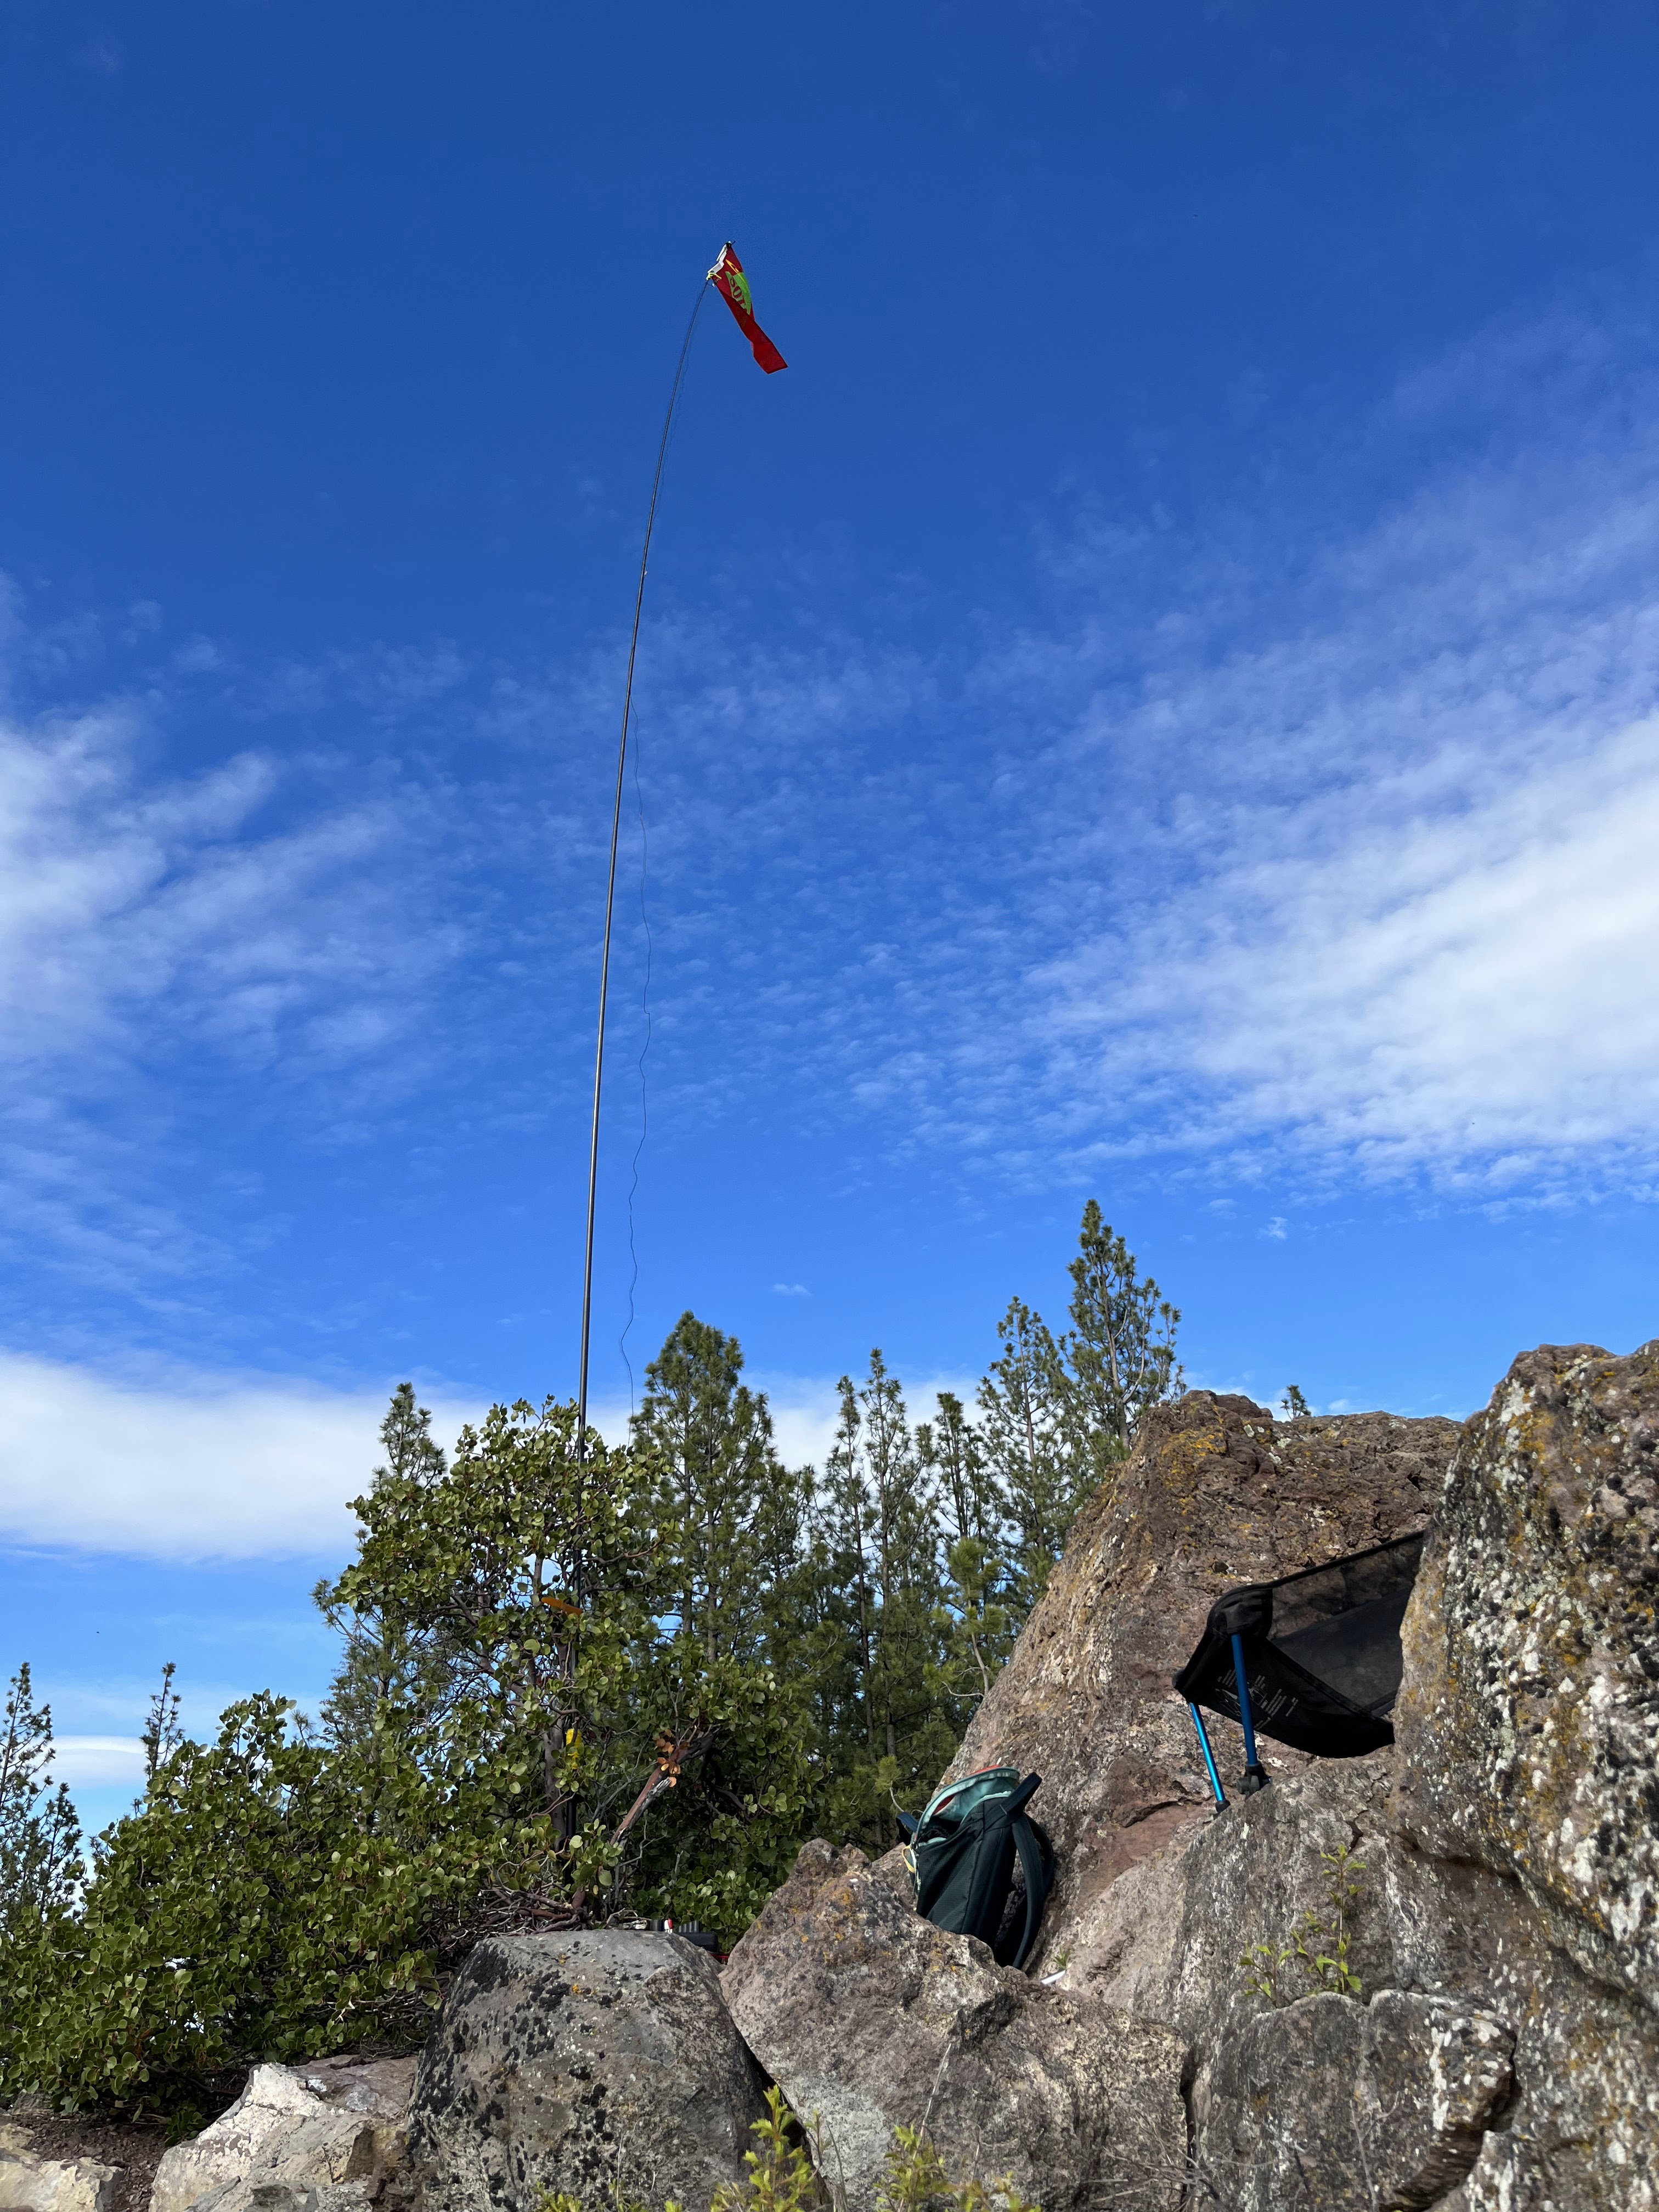
Once at the top I found a nice spot to setup on the west facing side of what appears to be the remnants of an old fire lookout. Temperatures were in the low 70's but there was a light breeze so I donned my jacket and sat down to try my hand on 20M. Using the built in memory on the TR-35, I keyed my CQ a couple of times until I had it just right and let'r rip. Crickets. More CQ. More Crickets. After about 35 minutes of nothing hearing anything, I decided to try 40M before packing up and heading out. That is when I noticed the ticks all over the place. I guess the wet spring was good for them, I'm not used to seeing so many ticks in our part of the world and was glad I was wearing long pants, a hat and shirt sleeves (not to self to do a thorough look-see when I get home).
After about 10 minutes of calling CQ on 7.061 I started to get a few responses. Between my nervousness and some QRM, I had to ask for lots of repeats but I managed to confidently copy several QSO's. I had planned to pack up and 6:45PM to be sure to have light enough to get down and home in time for dinner. I was still short one QSO for the points so I hit the memory key one last time at 6:44:30 and started to pack up my chair. NT6E came back and after only one ..--.. I had my final QSO so it was time to pull the antenna down and get back to the van.
It took me about 15 minutes to descend to the van and call it a successful activation. Thanks to
One of the things that drew me to amateur radio is the kit building aspect. Only weeks into the hobby, and before I had my hands on an HF rig I was ordering parts for an End fed random wire build I found on the AARL site. The first build went well but I haven't been very impressed with the performance from the QTH. Since it's a random wire antenna, it requires a tuner in the field, which I don't have with me normally so it hasn't seen much use.
I've built a couple of other antennas since with the K6ARK EFHW being my favorite but I wanted to up the challenge. I love the Icom IC-705 but its a bit heavy for SOTA Ops so I decided I wanted to build something smaller. I've been learning CW so I shopped for a really small, simple CW only kit. I looked at several packages and settled on the QCX Mini from QRPLabs. I ordered the package with the aluminum case and ACG module at a total of $84 before shipping, seemed like a good deal except for the 2 month wait.
Not long after I ordered the first radio I saw a video from Thomas, K4SWL, on the Penntek TR-35. I had looked at the radio previously but thought it a lot of money for a CW only radio that didn't have any memory. One thing I love about my IC-705 is that is has 10 recorded memories for both voice and CW, which is almost a requirement for calling CQ lest one get a hand cramp in the field. Everything else about the radio looked fantastic, 4-Band, 5 Watt transceiver in a nice plastic case to reduce weight. There are a lot of features packed into this little radio and you can even have it assembled by pro's at the factory if building isn't your thing. WA3RNC continually adds to the software and the latest update includes two memory channels that Thomas demonstrated during and activation and I was sold. I ordered a kit before finishing the video and it arrived in less that a week.
The kits is really, really well put together. The instructions are very clear and verbose. The parts are packed in sealed strips, with each step's parts in a separate little "bubble", so as long as you only open the current steps parts and complete that step prior to opening the next, you will never loose parts. I found this very, very helpful as this was the most complex kit I have assembled to date.
The instructions are broken into four discrete parts:
READ ME FIRST
TR-35 Upper Board Assembly Instructions
TR-35 Lower Board Assembly Instructions
TR-35 Preliminary Checks, Tests and Final Assembly
Also included are a schematic and Operating Guide.
This being a rather expensive kit, $279 USD, I didn't want to screw anything up soI read through the entire assembly instructions and highlighted things that seemed important or would be easily missed. This is something I learned after a couple failed builds due to missing a detail because I misread or was in a hurry... doh!
The entire build took me ~ 5 hours, though that was spread out across a couple of weeks as I had a trip and lots of work to do during that time. Usually when I build a kit I want to sit down and complete it start to finish so I don't loose anything but as I mentioned previously, the way this is packaged made it easy to complete a step when I had 10-15 minutes of free time over the course of the build. Since the toroids are pre-wound, it is mostly a soldering build. Having a good quality, heat controlled iron, good solder (Kester 60/40 lead) and flux (not a requirement) and side clippers are a must. The only other tool I used was my multimeter during initial testing.
Once completed, I let it set for a few days so as not to rush the testing. I re-read the Preliminary Checks guide and made a checklist of each of the tests so I didn't miss anything. Testing took me an hour or so, other than having to wait for new fuses for my Multimeter's ampere testing circuit so I could do the Final RF amplifier bias adjustment. Everything checked out, so I decided to power it on and make the final adjustments before testing it on the air. With those final steps completed and the final assembly of the case, knobs, buttons, switch covers done, I hooked it up to the 20 M dipole I have on the roof and listened. I was astonished that it worked and I managed to not screw anything up.
I've now had it out in the field a couple of times and used it in the backyard several times and am very impressed. My only gripe right now is that the output volume of the keyer and the overall output are linked, so when listening to faint signals I have to remember to turn the volume down before I key lest I blow out my eardrums. This may be something I can adjust but I haven't investigated yet. I have made a couple of contacts on 20M and intend to do several SOTA activations in my neighborhood in the near future as well as build the QCX Mini and do a comparison.